I got married to the love of my life in Fall, 2025!
As a young couple, we definitely had hoops to jump through as we kept to a budget as best we could. I had no wedding planner, and we made most of the decorations ourselves. As much as I couldn’t be happier with how it all turned out, there are a few things I learned and a few things I highly recommend every wedding indulges in! So here are a few tips, ideas, and inspiration photos for your own Wedding Planning journey!
Planning the Event
It’s not secret that Fall weddings can be tricky as the weather is unpredictable – especially here in Canada. So the very first thing we did was ensure we had back up plans for everything. Facebook marketplace may be your best friend during the original planning. There are a lot of people willing to rent out items for great prices, eliminating the cost of items like clear umbrellas to put up over the arbor on a rainy day. Items for weather conditions we made sure to have:
1. Umbrellas for the arbor and signing table.
2. Comfy shoes for the soft/harsh ground
3. Sweater that pairs with the wedding dress to put on in between photos, etc.
4. Generator for mics and speakers, but also for portable heaters
5. Blankets as our wedding party favors
Luckily for me, I didn’t have much to worry about, not having a wedding planner. My mother and I are both Type A which made the process so easy! However all the little details can get muddied quickly. Like a true Amy Santiago, I bought myself a cute binder, and broke everything down by event and need. So at the ceremony, we need Bridesmaid dresses, flowers, arbor, chairs, etc. Then as the planning went on, we checked each item off and kept all the items in one house to keep track of it all. The pages themselves don’t look pretty but the concept helped us not lose our heads!
Outdoor Ceremony Ideas
I had a location in mind that I absolutely HAD to have my wedding at. Not only did the location fulfill my tree requirement for fall colors, but was also close to a beach to get some lovely “destination” photos! However, finding an actual location to host the ceremony quickly became our biggest strife. Fall is the time of year when many place close to “winterize” the ground and protect it for the cold weather. So we pushed our wedding up by a week. Locations to try:
1. National Parks – this is what we did and some can be very cheap! However, some don’t have a great phone line to get ahold of..
2. Airbnb – although you do have to announce it’s for a wedding which may jack up prices, finding a beautiful acreage on Airbnb to rent out for their backyard and possibly a place to get ready in, is a great option!
3. Outdoor Venue Sites – there are many places meant specifically for outdoor weddings, however they can be on the pricier side.
Wedding Colors
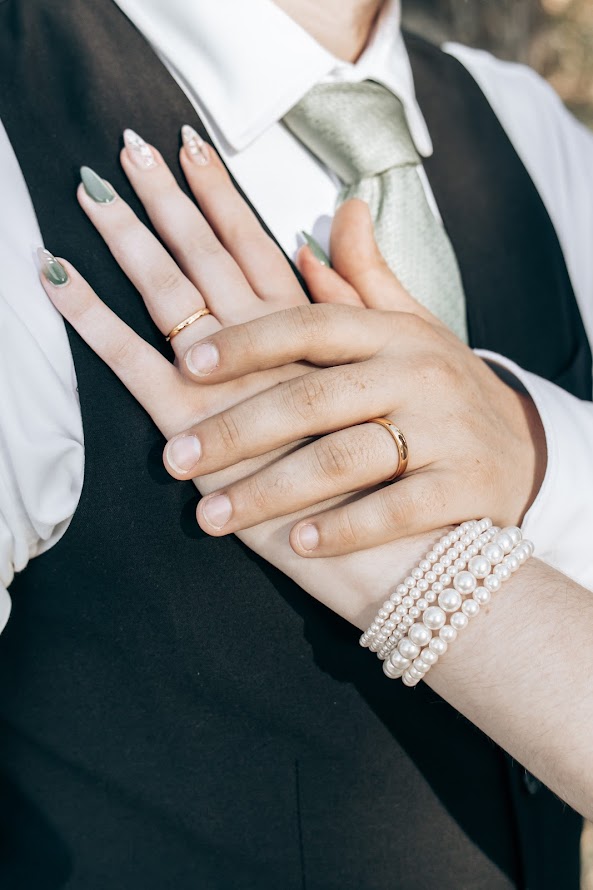
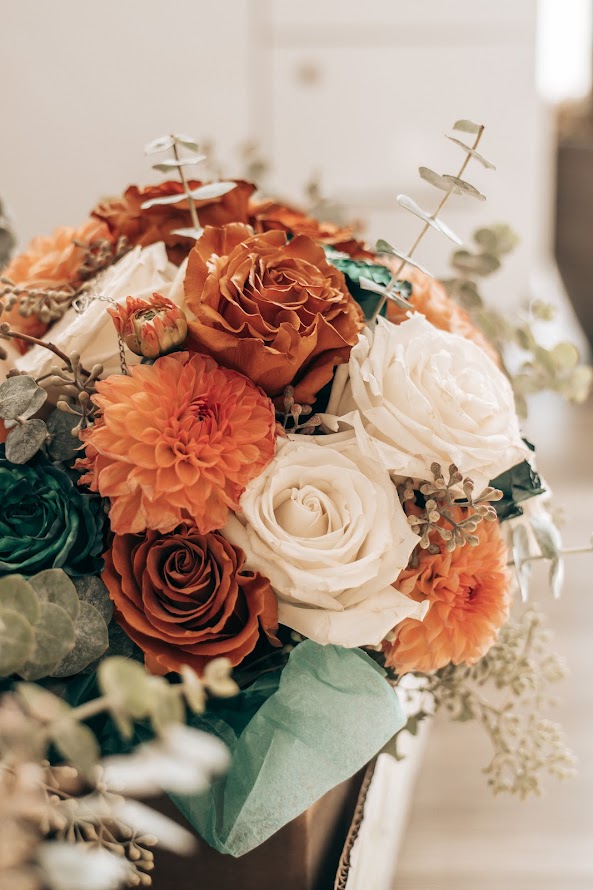
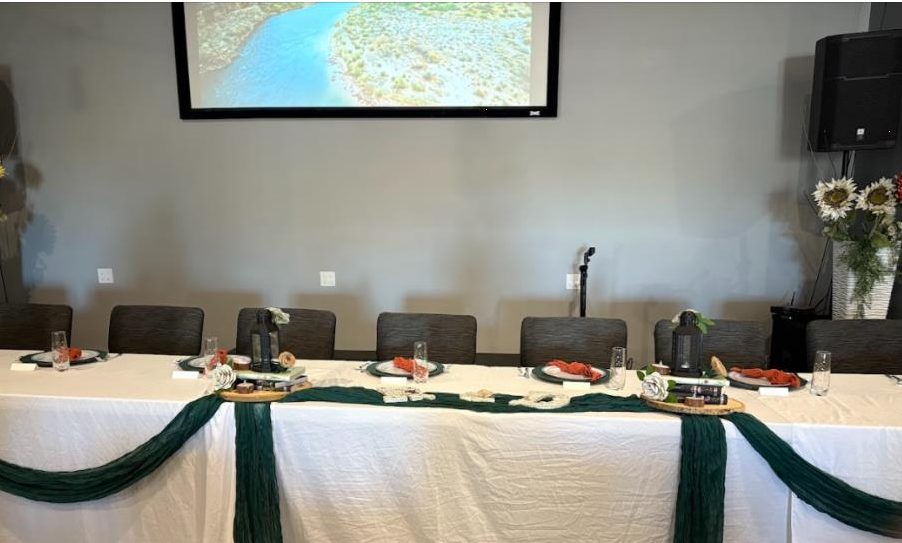
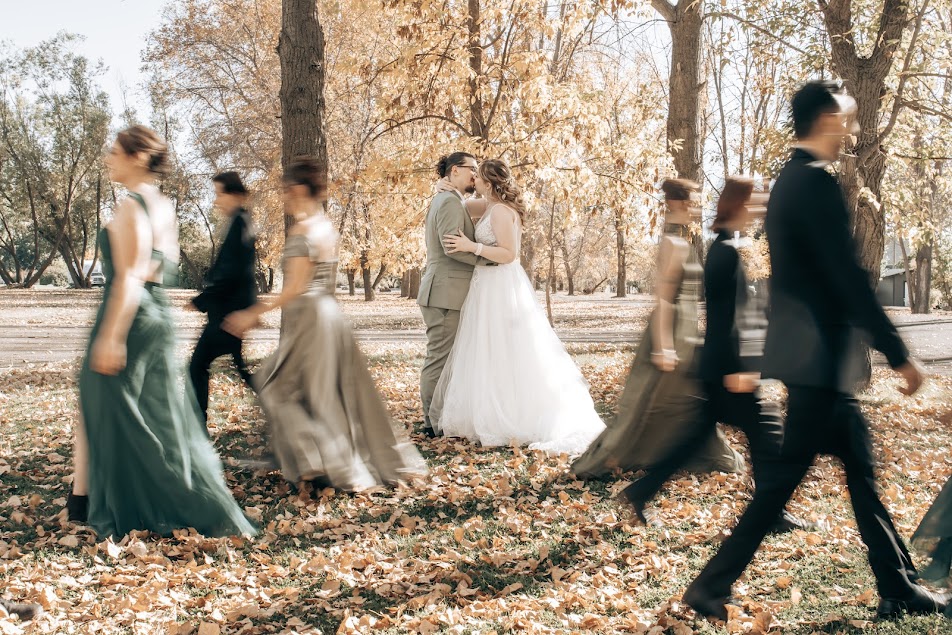
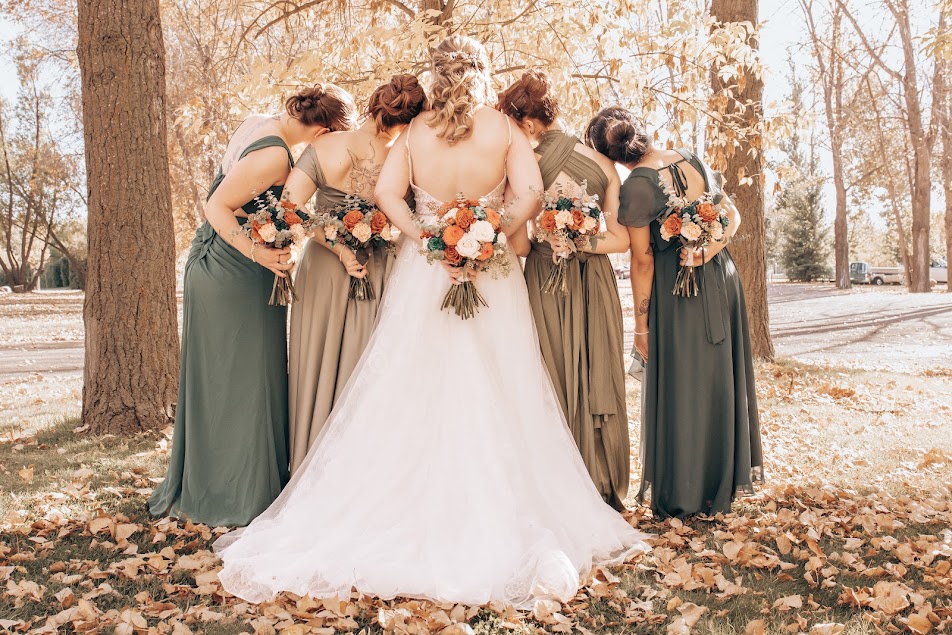
When it came to Fall Wedding colors, I chose to keep it rustic and able to compliment the scenery well. My wedding pallet was sage green, emerald green, and terracotta as the accent. All my girls did the pallet style dress picking where they chose their own order (besides the Maid of Honor) and picked a dress ranging from light to dark green. I kept them all muted rather than bright. Their dresses were in the colors, sage, olive, emerald, and forest green. This made it really easy to add to the autumnal outdoor vibe, rather than being a sore contrast to it. We were also able to get ties in all the same colors, so the groomsmen carried the same pallet across the row!
DIY Wedding Decorations
Our wedding was fantasy / bookish themed. My husband and I bonded over both things early in our friendship before we even became a couple and it felt fitting to the occasion. So the things we focused on making DIY mainly fit this theme. Below includes external links to some tutorials, some generic items to DIY (like flowers, and name cards), and theme specific choices.
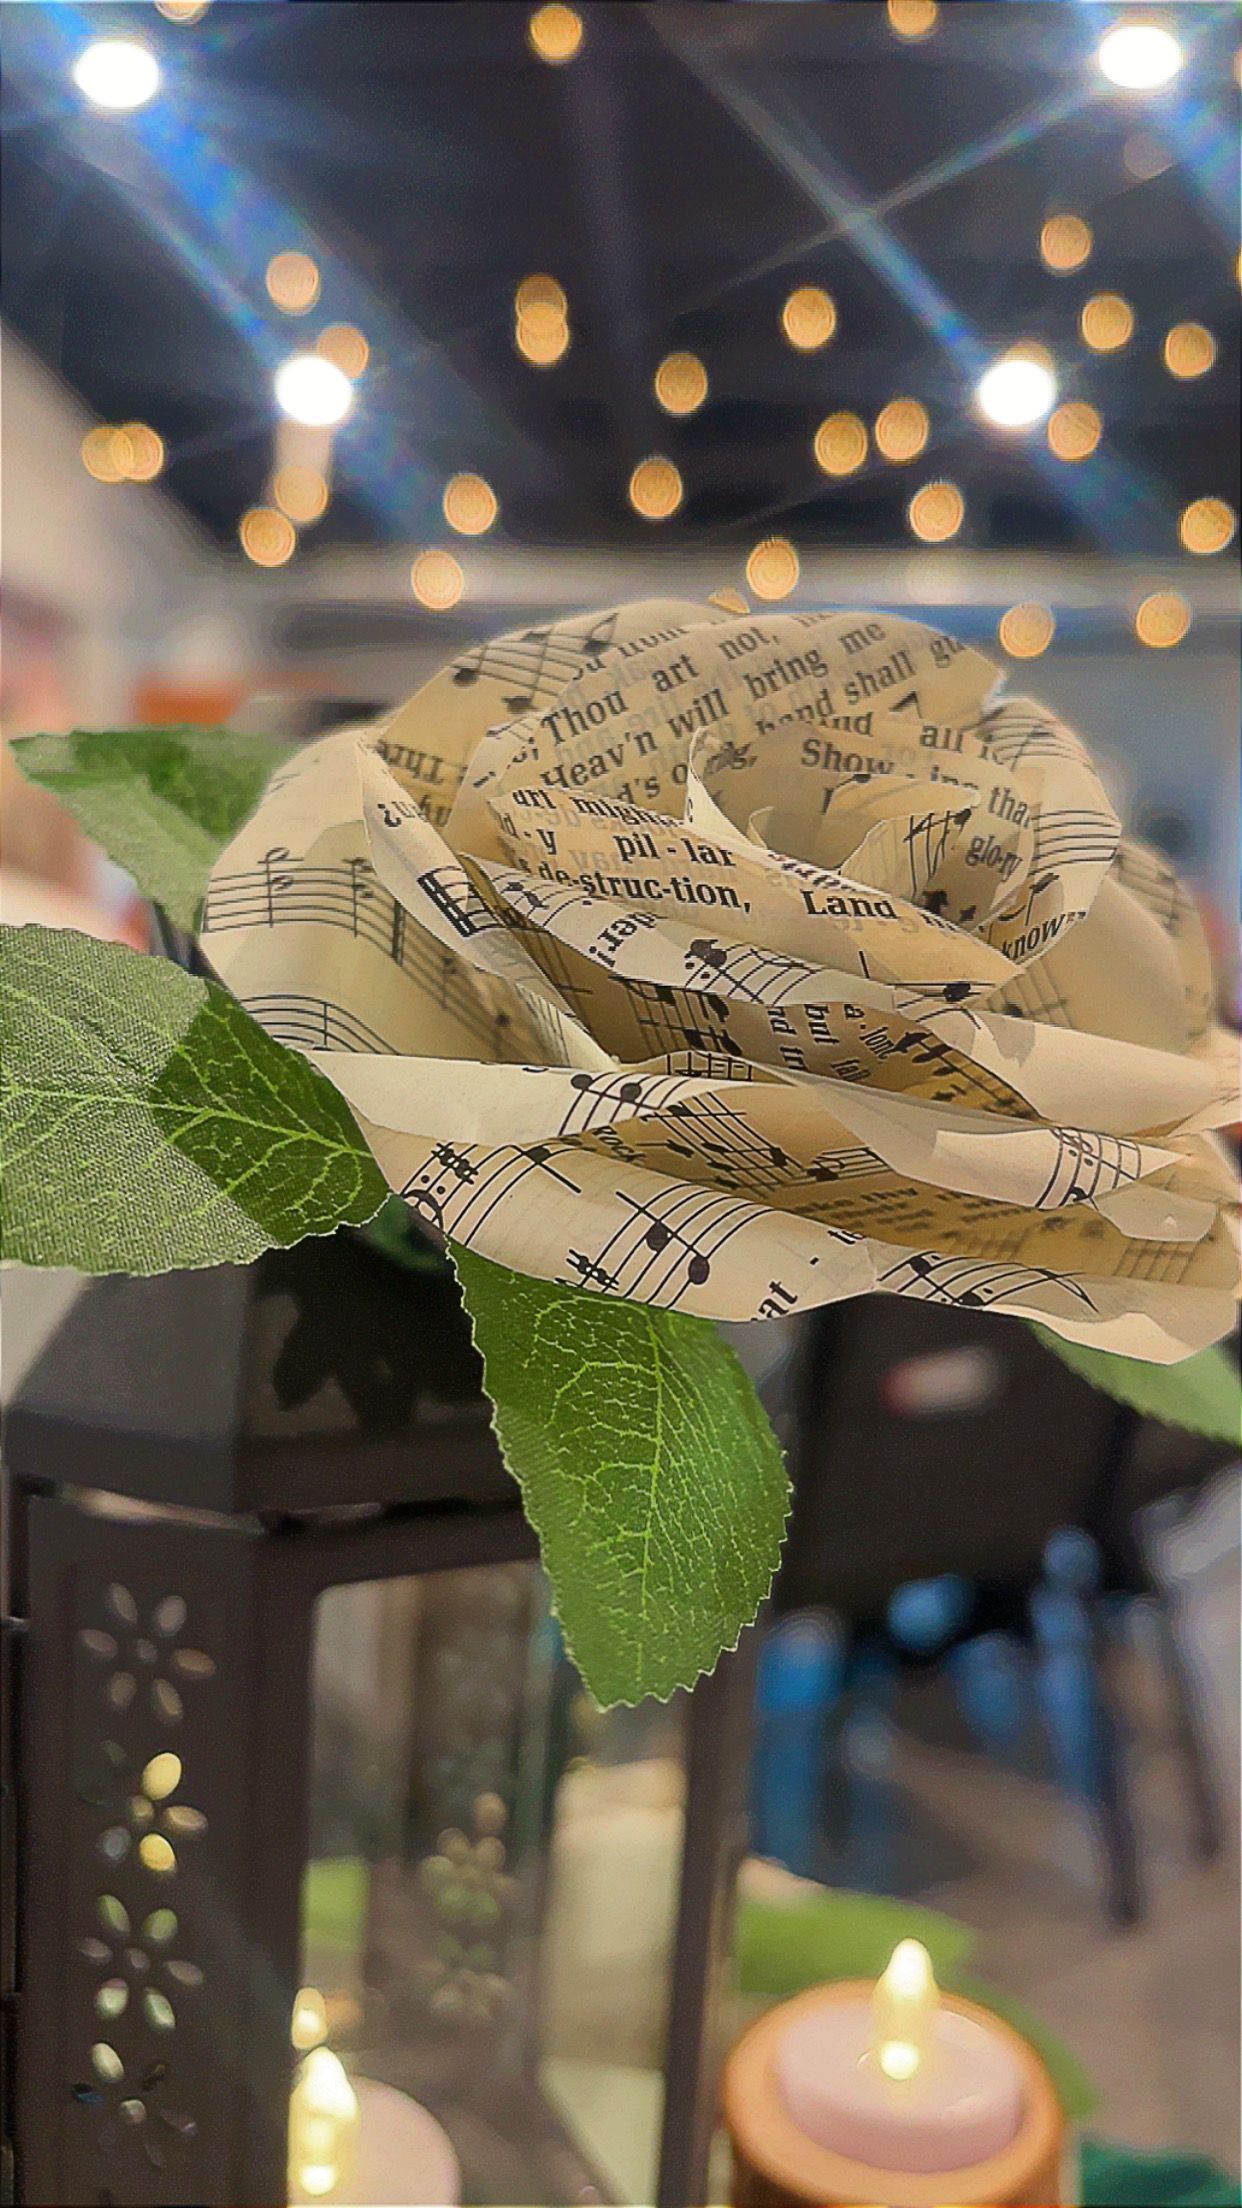
1. DIY fake flowers.
In my family there are a lot of allergies! This meant that we focused heavily on fake flower designs to fill our space. We used old hymnal books to get the paper for paper roses, and made enough both for the centerpieces at the reception, and to hang on the edge seats of the ceremony! Paper Roses
Some other flowers, unfortunately I cannot describe fully, as my Aunt came up with most of the designs. However, from what I know she used burlap ribbon for some, and coffee filters dyed with green tea and cupcake holders for the middle of others.
We did also use some real flowers! Try to remember to ask for some loose flowers from your florist to add details to the tables, and decor!
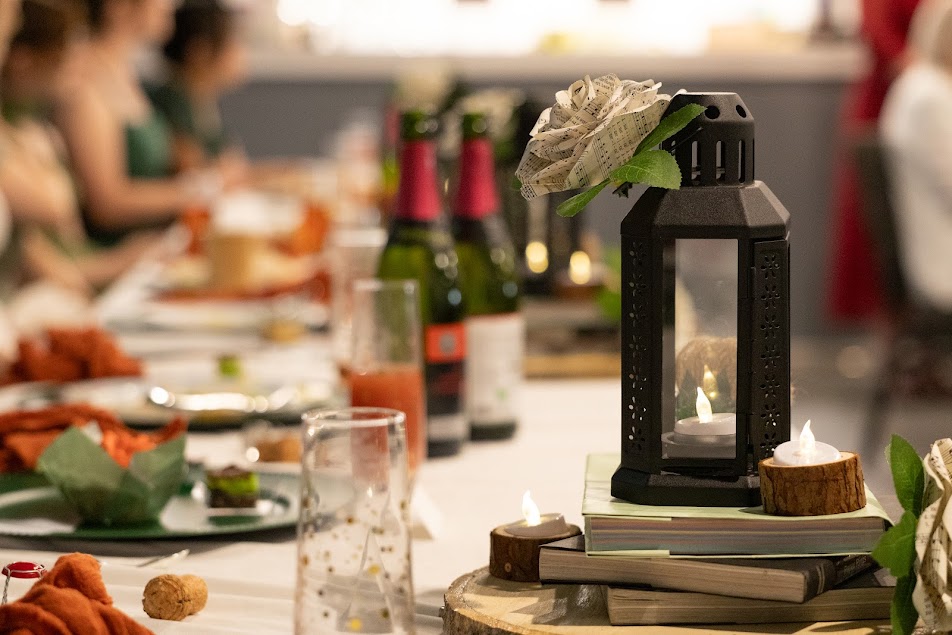
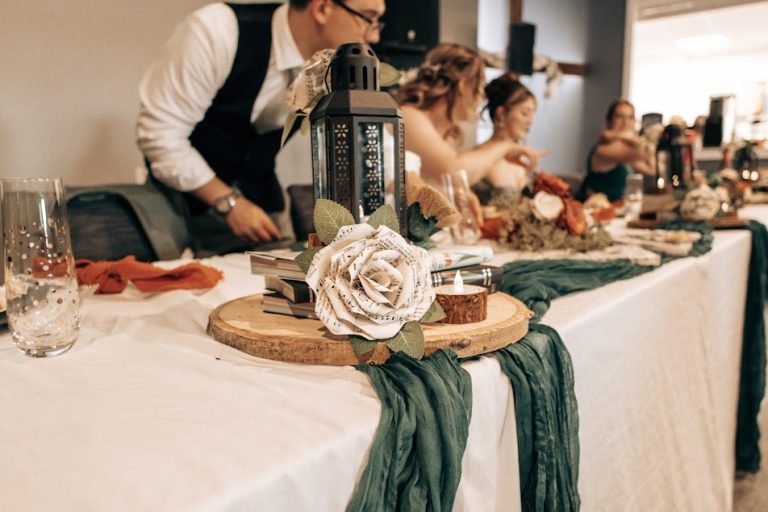
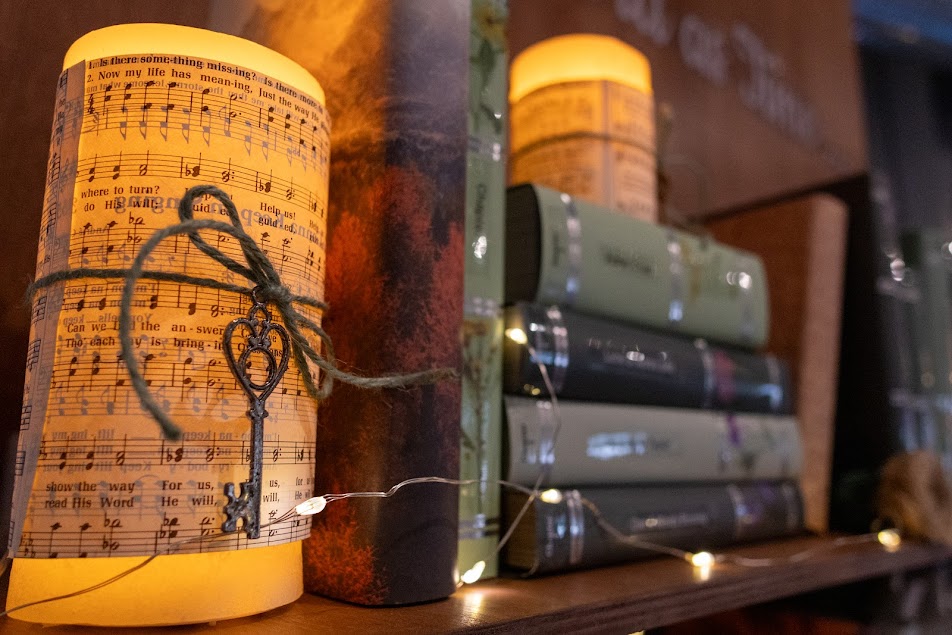
2. Wrapped Candles
Similar with the flowers, and also for the ease of mind, all candles were fake. It was easy to be able to wrap fake candles in decorative papers, and tie it off with twine to decorate the candles in a reusable way.
3. Table Name Plates
I wrote all my name plates by hand! I got a beautiful calligraphy brush pen and made them all myself. I cut up cardstock paper in 6″ by 10″ strips. Fold them the long way to make a crease able to stand up on the tables, and write the name of the guests. To clarify, the name was written on the long side (10″) and it stood at 3″ high once folded. Not to toot my own horn (…) but many people thought they were printed off a computer!
4. QR Code Photo Sharing
I also created 3 QR code plates for all the tables! The website you can use to add your own link into a QR code is here. I have extended storage on google, so I linked the QR code to a shared google drive for people to share all their photos of the wedding! This allowed us to enjoy seeing other people’s perspectives of the wedding! I made them in a similar way as the names. I did 10″ by 12″ (or whatever height the printed QR codes make). That way I could print the QR codes in bulk, cut them up and add them to the folded cardstock. I then added pretty golden flower stickers from Michaels and wrote a little “Capture the Love” blurb, explaining how it worked!
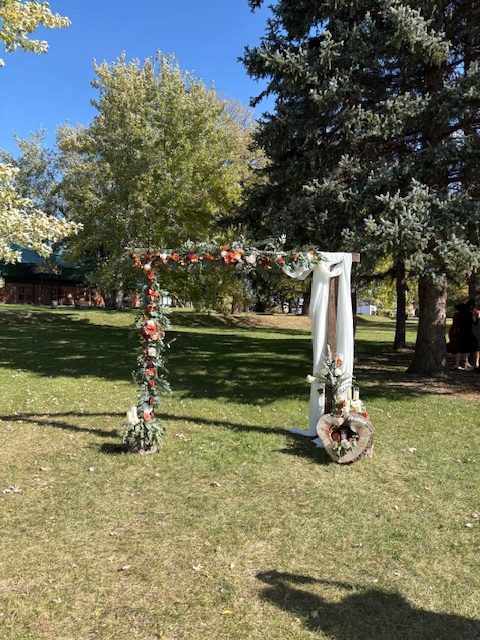
5. Arbor Decorations
As you can see in some of the photos, we used a lot of wooden slates to fit the rustic vibe. We had a great connection to get them from a friend, but if you don’t have a way of cutting them up yourself, many companies or small farms that chopped a tree or two may have a variety of sizes to sell you! The one in the arbor photo had a natural heart shape in the middle, so my father sanded it down further to take on the shape. We propped it up and added the candles, and some extra live flowers to the mix!
Finally, a cool trick to not needing pool noodles, and an aunt with talent to decorate, is to use a couple flower table runners to wrap on the arbor!
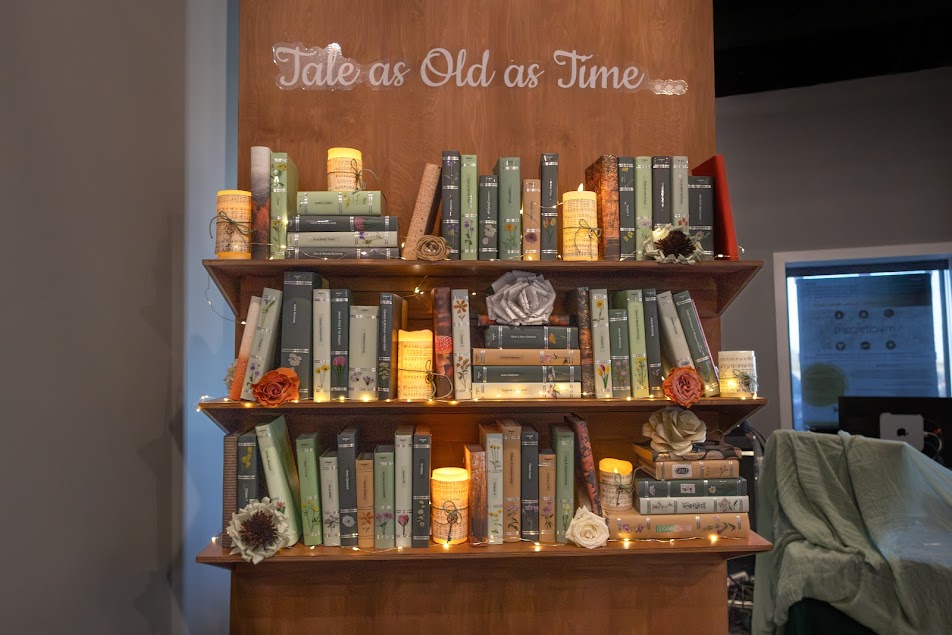
6. DIY Bookshelf for photos and seating chart
This one is fully curtesy to my father! He went and got a large piece of wood for the back, built the shelves using leftover pieces, stained it all to the desired color, and added the “Tale as Old as Time” decal. The whole thing was easy to set up and take down, and he used a wedge technique to take the shelves on and off for transport.
For the books, we used cardboard and wrapped it in the color needed. Then with a label maker, we grabbed clear label stickers and printed off all the names of guests to stick to the spine. For authenticity, we also printed off book lines so the exposed parts (like the tops of the books) looked like pages rather than cardboard! Using empty bible boxes from a Christian school or church is a great way to achieve weightless books of similar sizes!
7. Scrapbook Guestbook
This was an absolutely stellar idea I saw once on Instagram, tried to look up and couldn’t find really anything! But seriously DO THIS! We had one friend set up to help people with a polaroid camera. We had enough film for each set of people (individual, couple, or family) plus 10 extra for failed attempts to save money on the prints. Then I brought stickers, washi tape, and colored paper from my scrapbooking stash with me. Some people just decorated a small section and wrote some cute notes, others went all out with stickers, backdrops, etc. We had them do so in the middle of a scrapbook so I could put the whole story of our relationship into the book. The front, our dating journey; and in the back, the professional photos!
List of Budget Savers
Finally, I’d like to share a simple list of money savers we managed to use! Although some of the items have already been talked about, this may give you some great ideas to finding the right fit for you!
1. Renting on Facebook Marketplace
We rented the ceremony chairs, the wooden arbor, the umbrellas, and the table clothes/ table runners. You can rent just about everything for weddings this way!
2. Newer Photographer + Cake Artist
Luckily I knew someone who just graduated in culinary baking, and someone looking to upgrade their photography career from individual photoshoots to weddings. In both cases, I was able to get much more affordable prices! Now I will warn you to look into their previous works, work closely with them leading up to the wedding so they feel prepared, and possibly setting up a trial photoshoot (like an engagement shoot) before going forward. I am so thankful for everyone who made my wedding come to life, and I do not regret for a moment choosing these people to work my wedding!
3. Wedding Dress Expos!
Oh man was this a life saver! We had originally booked appointments and wedding dress stores, but found out the night before that there was a Wedding Dress Exposition happening the same day in our town! So we got to look at new designer styles, from young artists, and buy at half price.
4. Rehearsal Dinner at Home
We hosted the rehearsal dinner at my parents place. They had a field behind their house that worked perfectly for what we needed. Really, the only people needed at the actual rehearsal was the officiant, the wedding party, and the piano player. My father directed things in terms of cues for the piano player and officiant, and I guided my party. We didn’t let anyone else outside for the trial, and didn’t need to go over anything but the walk up order, standing placement, and the flower distribution during the signing portion.
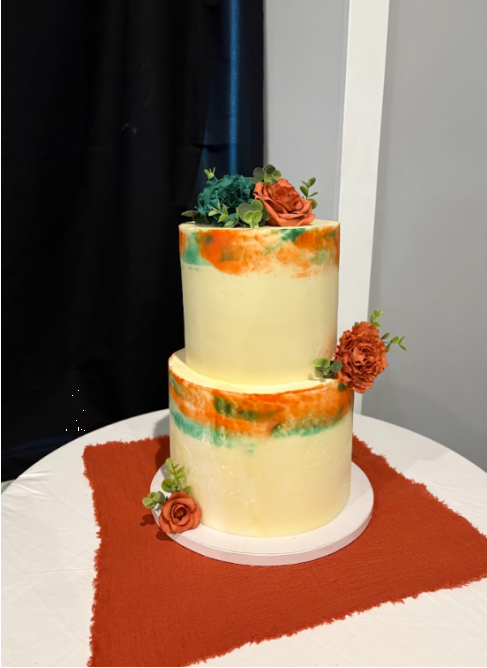
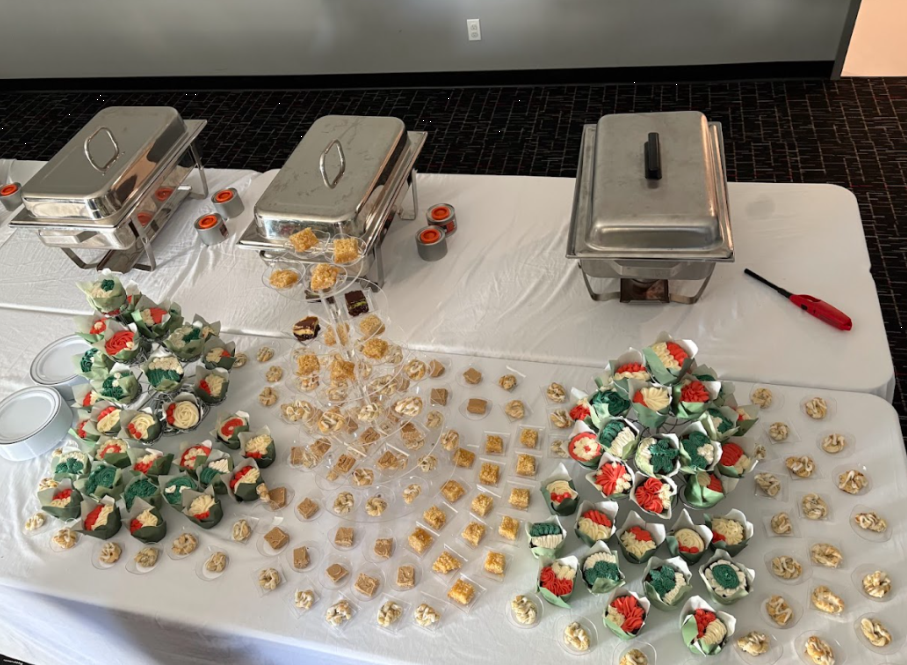
5. Homemade Desserts
Instead of doing a big cake and paying tons, we only had the top tier of the cake made real for the cake cutting portion, and the rest of the desserts were cupcakes, and bite sized squares (nanaimo bars, fudge squares, etc). This not only appeases the bank, but the guests who may not enjoy cake so much as other sweet treats.
6. Other Borrowed Decorations
Listen. I understand that my husband and I fell for the new millennial grey, but I am comfortable loving sage green none the less. (Sage green may have become the Gen Z version of millennial gray…) However, this made it convenient to know other newly weds. We were able to borrow other sage green table clothes, and decorations from our friend’s weddings! Some of it, like the charger plates, we got permission to spray paint to our colors too!